1/11/2026
January 11th, 2026.
Sunday CAD & Design Recap
135 had a very productive day for our design and general game strategy! We conducted further revision of our MOSCOW, adding things like deciding on no pneumatics and not flipping over in endgame for V1, but most importantly, we landed on twin shooters for V1 of our robot. A few things caused this:
- “One is none, Two is one.” Having two shooters will allow our robot to keep shooting if one of them breaks, stalls, or jams.
- The weight of the robot is predicted to be quite light... given the giant hole in the center. So, only one, we completed offseason turret CAD, and estimated the weight to be around 7 lbs for the main turret/wiring aspects, and presumed (on the heavy side) 7 lbs for the shooter. That's only 14 lbs each, and relative to the number of mechanisms in Rebuilt, it's quite low.
- Having twin shooters should make our packaging actually a little easier when it comes to funneling. One channel being guided into two is a LOT easier than channeling all of the Fuel into the center, from what we have seen in 2017 and 2020.
- Most obviously, higher max Fuel per second.
With that said, we had two superstructure ideas that we still haven't settled on after today, but both are quite similar.
- One is to have the hang in the corner, where we can focus on side hangs, but we're not sure of a final hang yet.
- Another (2) is to have the hang in the center, funneling the Fuel with an active group of rollers, which would just divert left/right, technically slightly biasing one side since the very front roller would have to be one of the two directions. This allows for a center hang.
DRIVETRAIN:
30x25.
We chose to max out the robot perimeter, since more Fuel = more points. Specifically, we maxed the frame from intake side/turret side, so as to have the widest possible intake. We’re almost done mocking up our bellypan/wiring pan, and we decided to go for a ⅜” drop from the bottom of our chassis rails for the belly pan, so as to be out of the way of our Indexer. 3/32” on 2x1 chassis rails, for the outer frame, which has already been machined & powder-coated in-house!
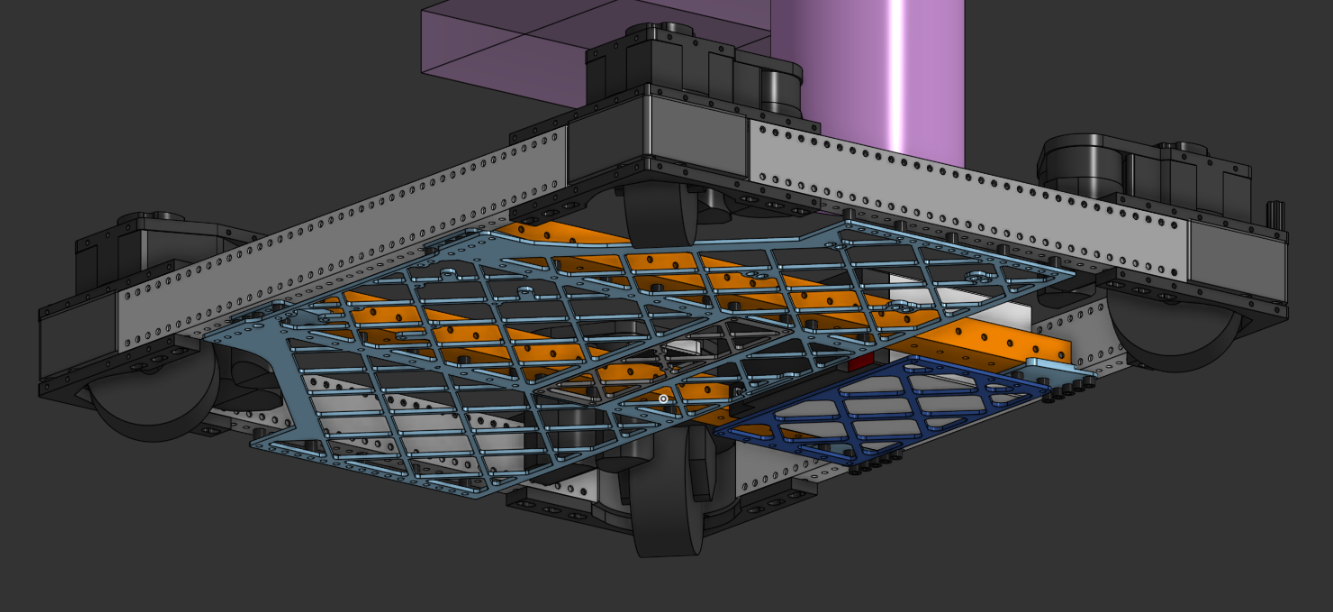
Once again, to maximize space for the Fuel, we’ve stuck our battery underneath our Hang, so as to FURTHER bias the robot towards the Hang, which serves two purposes.
- Biasing towards a side makes going OVER on that side a lot easier.
- Biasing towards the hang allows for less work to be done, as the overall moment arm will be less.
We plan for the bottom to be SRPP, or perhaps some other material, so as to either be impact-resistant or help us get over the Bump easier. Further research is needed on that.
INDEXER/ROLLER:
We’re planning on running a lot of silicone wrapped 1” OD rollers (called our Floor rollers), geared up enough to keep an active “pull” from the bottom on the Fuel. With that said, ensuring both positive “pressure” on the Fuel and as many Fuel as possible is paramount, so we plan to have “kickup shelf” rollers near the turrets, which will allow for a higher BPS (balls per second), and additionally serving as a possible “jackhammer” if we need to fix a clog.
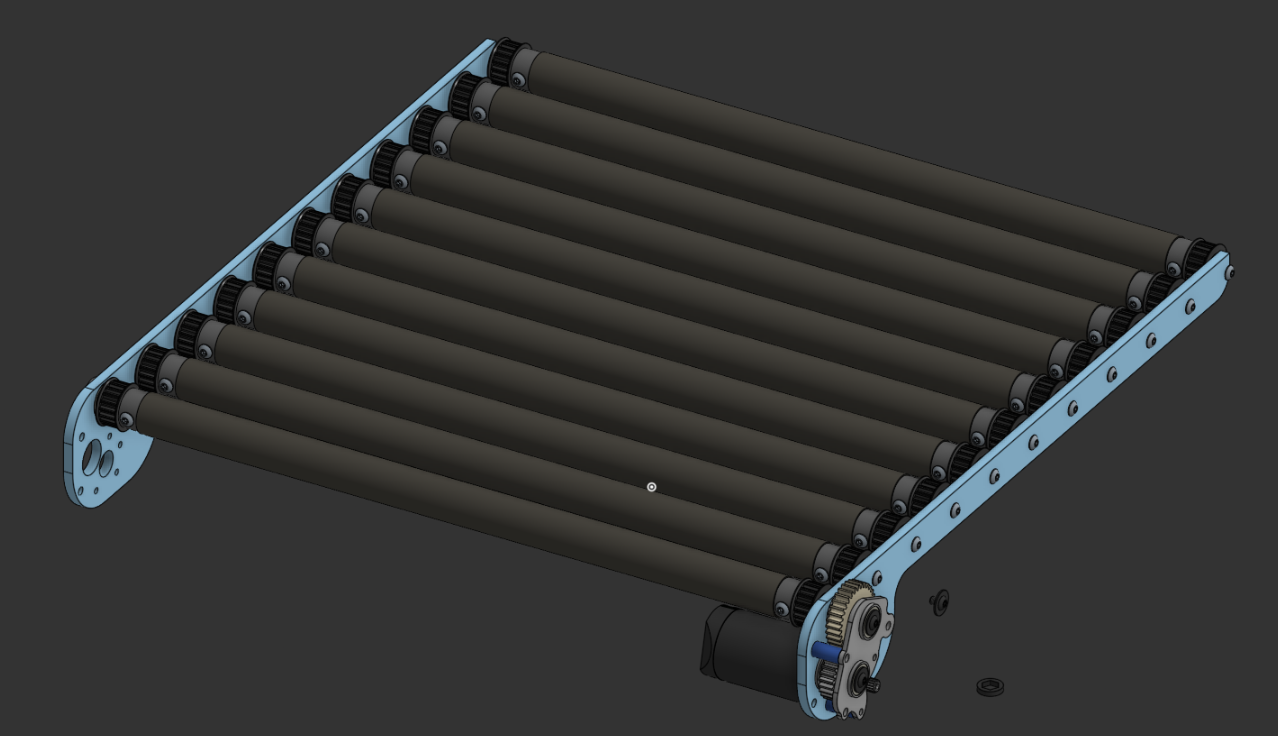
We’re currently working on prototyping the true pull strength of these rollers and adjusting them to fit our robot packaging.
Using an intake we have in CAD from a random offseason project as purely a visualizer, and the purple boxes being our turrets, here we plan to have the Fuel be shot upward into the intake, and then form a U shape in the Fuel’s path, to get as low to the bottom to maximize Fuel capacity. The end upward slope would be achieved by a top “kickup shelf” roller, as well as our Floor rollers, and whichever active solution for either our design 1 or 2. We plan to allocate two motors to indexing.
With the designs we have right now, we should have the ability to stack 3 Fuel vertically, top to top, for almost the entire robot… except the turret, obviously. And, it’d still fit under the trench!
--will be posted by grant
--will be posted by Catie (below)
Climber Update - Sunday Update
What a day kickoff was yesterday! We continued our momentum today on our hang design, exploring a variety of different options and combinations. Our goal? Be as versatile as possible, while also not overengineering and overcomplicating our design.
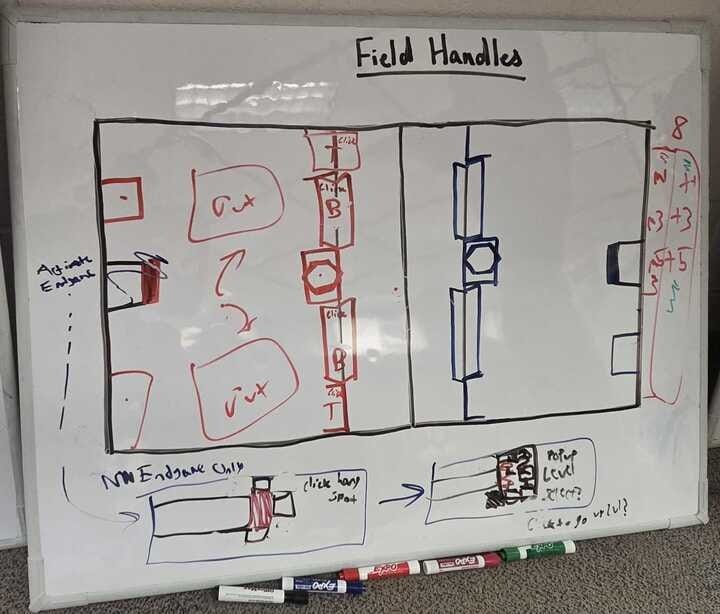
Step 1 - Where does the hang go?
The day started by (attempting) to finalize the location of all our subsystems and budgeting space. Obviously, we had to prioritize the most important subsystems first–our turret locations, indexer, and intake were primary, and a hang could be placed almost anywhere else. As Grant said, we decided to take the route of building twin shooters. With our intake on the opposite side and our indexer taking up as much space as possible, the hang would have to share a side with our turrets. After budgeting for the size of the turrets, we estimated that we’d have ~10” of space to work with for the hang, which was more than enough.
The only remaining question was where we were going to position the hang. We had two options–either place it in between the two turrets, or have it on one of the outside edges with the turrets being side-by-side.
Step 2 - But there’s so many ways to climb!
Yesterday at kickoff, we quickly identified that how many bots could hang on L3 could become a match decider… frequently. If we wanted to maximize our success, we had to be adaptable. So, we sketched out some ideas of how we could hang off the side of the extrusions that make up the ladder, coming up with an approach that looked somewhat like this:
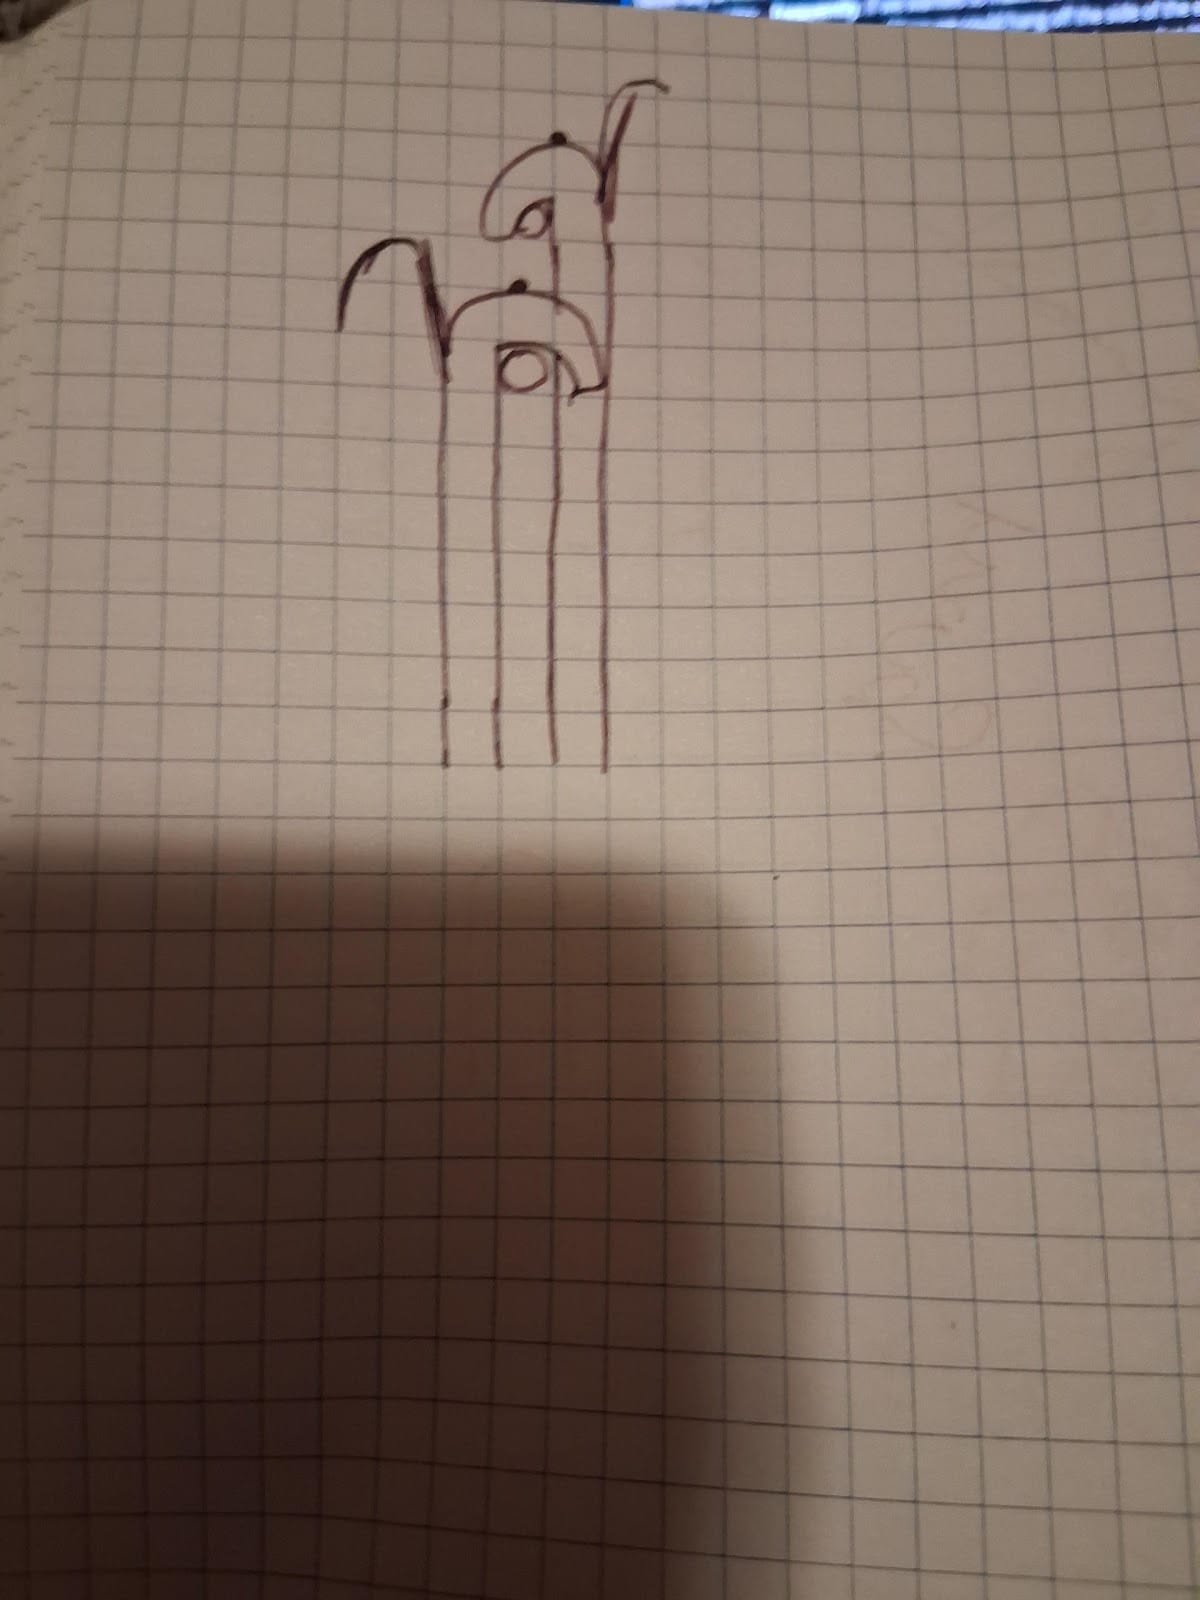
Definitely not my finest sketch… but hopefully you can see the vision. Two extending arms, reaching up one at a time, keeping the robot truly on the side and leaving plenty of room for other robots that might go for center climb. This design could also climb either side of the tower.
The doomsday scenario was in front of us. The regular pre-match strategy meeting with the other two teams in your alliance, and it gets to Endgame. The other two robots can only side hang. You can only side hang. There are only two side hang spots. Just like that, 30 points down the drain, more than enough of a margin to change the outcome of numerous matches. We had to find a way to climb from anywhere.
Step 3 - Climber in a box… but scary.
The initial thought was to have multiple hooks that could make our climb omnidirectional, but it produced a very interesting assembly…
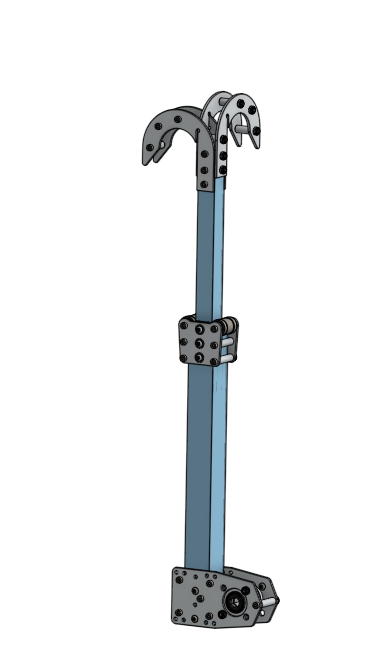
Definitely lacking in both speed and practicality, and it definitely needs a lot of improvements. But there’s a series of improvements to come, including a system that can easily and quickly be changed out post-alliance strategy meeting. We’re excited to update you on how our hang progresses next!
Scouting and Programming - Sunday Update
As the season starts, we have refreshed our code from the past years and are ready to work towards the Rebuilt season. Here is our official 2026 REBUILT Robot Code so far.
Scouting! 💪💪💪
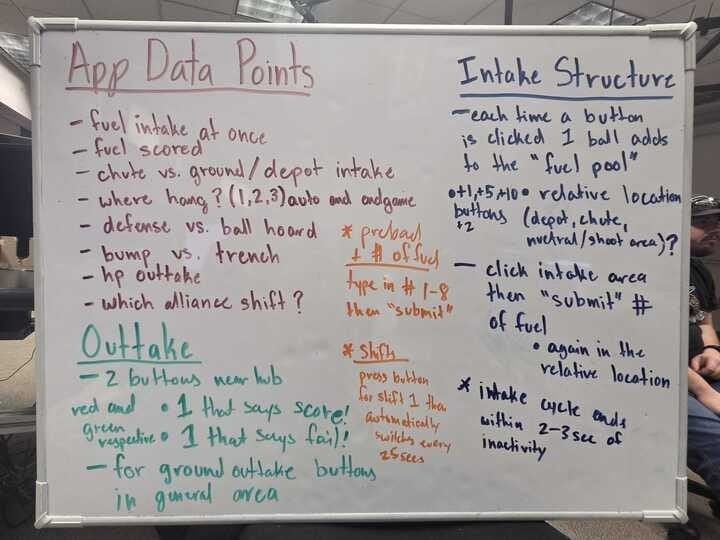
We started by planning out the specific data points that would be best to observe. With the game piece intake being similar to 2017’s Steamworks, the main thing we would have to look at is fuel intake at once (at once being intake in a full cycle of loading fuel and shooting in the hub or out-taking on the ground). Along with that, we would like to keep a track of where each robot is taking the fuel. For example, some robots may focus on hoarding balls via human players when their hub is inactive, then collecting all the fuel during their alliance shift. This gives us ideas on how to strategize and what part of the field we could and should focus on.
Now to the out-take part of the app, the main 2 areas the bot can out-take are under the chute and in their alliance shooting space (to hoard balls mostly). The general location seems to be less of a concern compared to the amount of fuel that the robot is out-taking, so the function for this is pretty similar to the intake function for counting the fuel. To make it more user-friendly, we made some limits based on the robot’s movement between the neutral zone and alliance zone using the bump/trench to track what is possible in each area. For example, when the robot moves from the alliance zone to the neutral zone, the user clicks the bump or trench, changing the screen so the alliance zone becomes an out-take area instead of an intake area.
When it comes to the Alliance Shifts of the match we found that it would be best for the scouter to click a button on who get the first shift then hard code a timer to switch the hub between active and inactive every 25 seconds until end game.
For now here a somewhat detained list of things we are looking at and a mock-up of the interface:
I am sooooo excited to see how our app will turn out this year and we will make sure to keep you updated!!!
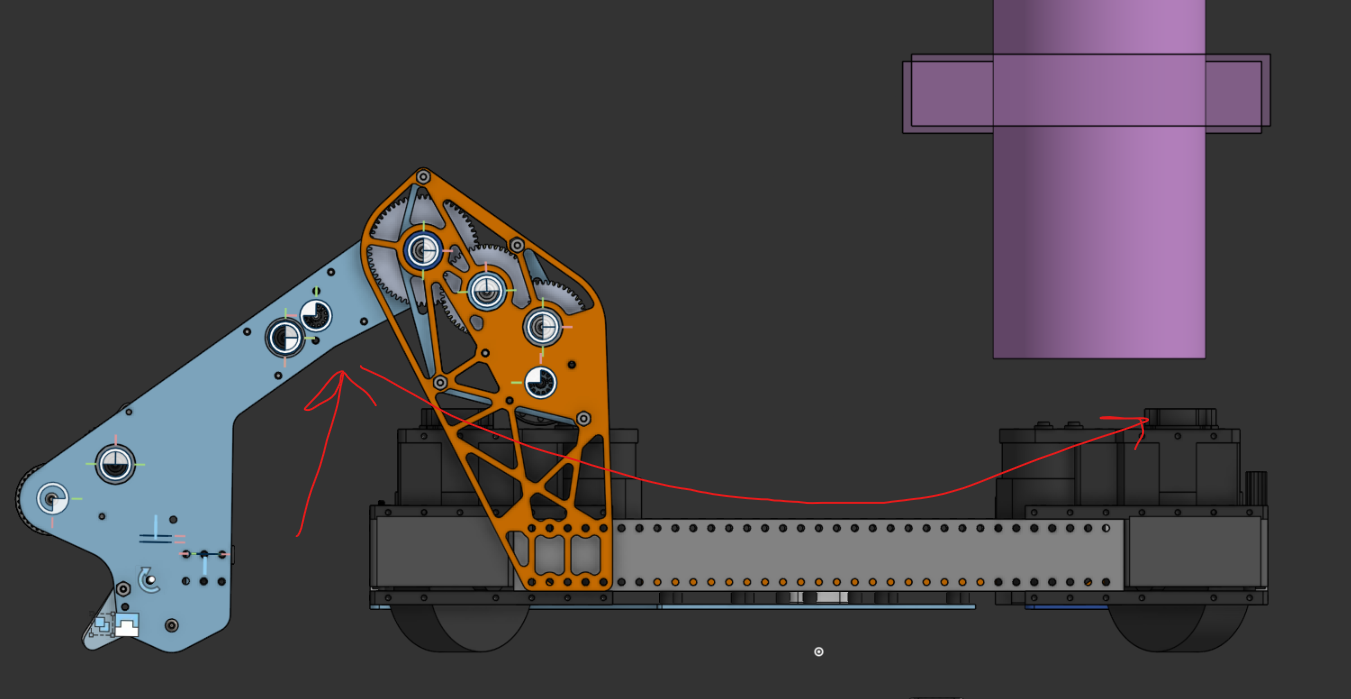
Turret!!! 🔥🔥🔥🔥
AHHHH this is a big load… but I get to make the turret!
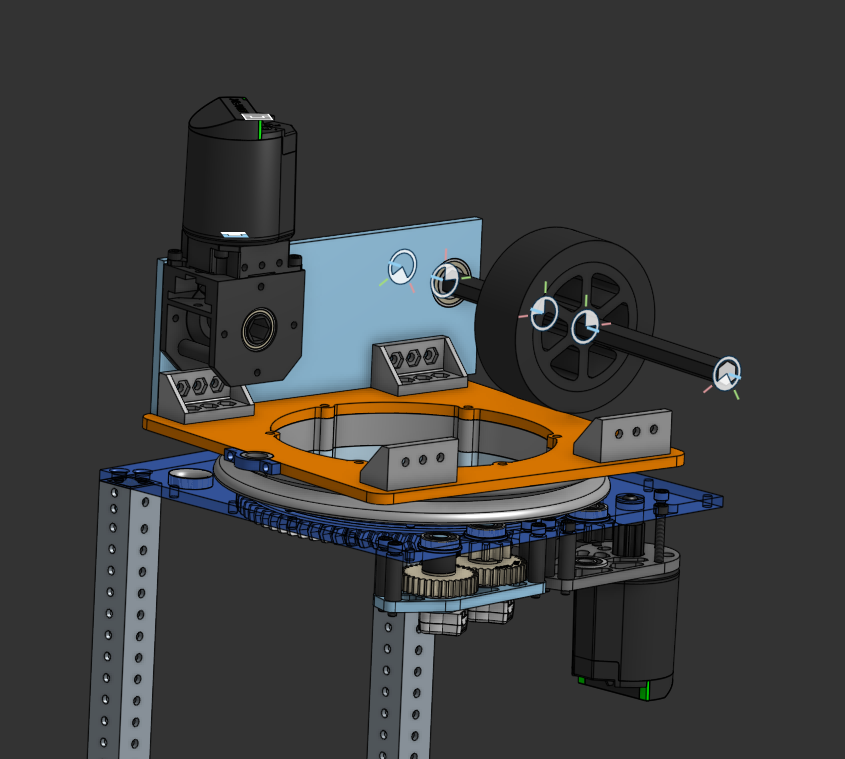
My initial design had the flywheel motor on a 90 degree gearbox, but after a brief meeting, we decided that it would be best to do either
- directly drive the flywheel OR
- Create a 180 gearbox so the motor is parallel with the flywheel shaft.
Seeing that the entire flywheel assembly is towards the front, I can continue on my “slimjim” design. Lighter == more better!!!!!!
The hood is kind of a different issue.
For accuracy, powered wheels would be optimal on the hood. That’s easy enough
I can also easily design a hood design that can go 15-45 degrees, and I can make a turret design that goes from 45-90 degrees. The problem is making a hood that can do both. I struggled for most of today thinking about how I would do a multi stage turret hood, but the best idea
came out of the pit. Yall know how those cheap lightsabers fold out from the handle? Why not do the for the hood? Simply mount the base to the revolving plate and attach the turret arm to a zombie axle on the flywheel
l
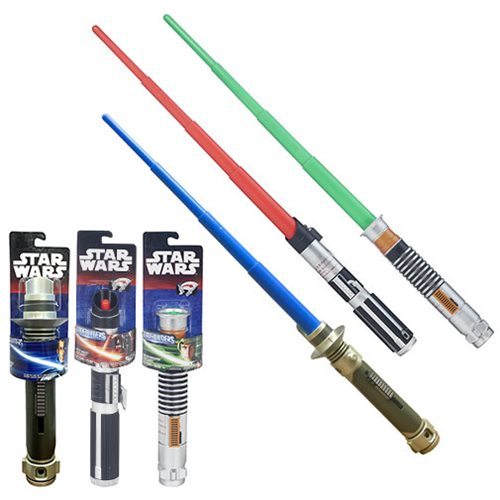
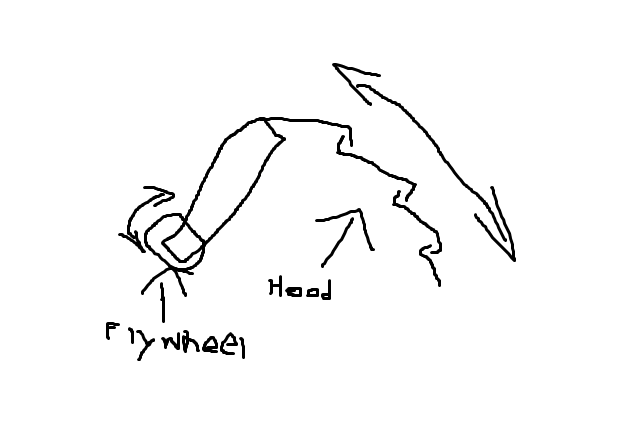
See the resemblance kinda????
Other than that, turret is a turret. I’m intrigued to see what other teams do with theirs.