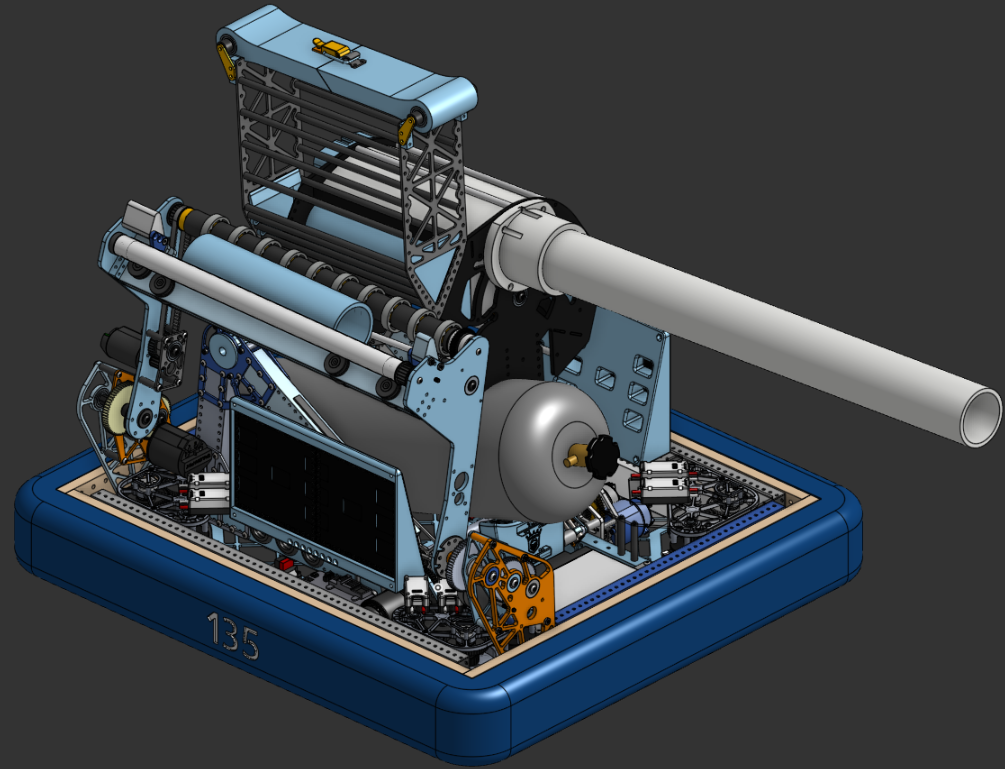
Gatling-Style T-shirt Launcher
A revolving, multi-shot T-shirt launcher that should put shirts 40–60 feet, (or more as we continue to develop) into the stands. But the journey to get here is really where robotics becomes fun, so keep reading!
Phase 1: The Idea (aka “How Not to Build a Pipe Bomb”)
Back in May/June, our team floated the idea of a new T-shirt cannon. We had one before: it was a lot of questionable material choices, and if you dig up this Chief Delphi thread, you’ll see why people called it a bad idea. Our younger selves were optimistic… maybe a little too optimistic with using PVC in places it shouldn't be, but hey--we learned. We then had a secondary one, one developed with safety in mind, but it wasn't designed to do pivot up, store more than one burst of shots, or anything.
This time, we decided to treat it like an FRC build season. No copying “the best” design floating around (Since that wouldn't exist in season), no shortcuts. Just:
- Research what actually matters (airflow/volume > pressure, barrel fit, indexing/sealing reliability).
- Trying out parametric CAD in Onshape to iterate fast.
- We hadn't done this in prior years, either parametricity or Onshape, since we used what we knew worked. The offseason is a great time for any team to try new things, and we've discovered how much Onshape speeds up our teams workflow!
- Materials testing (Trying out the new SRPP and new laser settings, plate-based designs, part-lightening).
- Drivetrain + bumpers + intakes + frames all being done entirely to 2025 competition spec. Anything except the slightly massive air tank is designed and assembled FRC legal.
We wanted to make something safe, upgradeable, and flashy enough to truly wow people at pep rallies and parades.
Phase 2: CAD and Design Discovery
Before the school year ended, we wanted to make everything but the indexer in both CAD, and assembled.
To that end, we developed a parametric system of assemblies, which allow us to dynamically choose chassis sizes, intake sizes, and the drivetrain parts get reassembled/modeled, the bumpers are entirely redone, and our bellypan is redone, all with part-lightening.
It was a real test of Onshape, and it proved to be better than anything Fusion could have done. While some teams may find it to make more sense for their enviroment, Onshape's powerful tool libaries are simply too much to not swap for us.
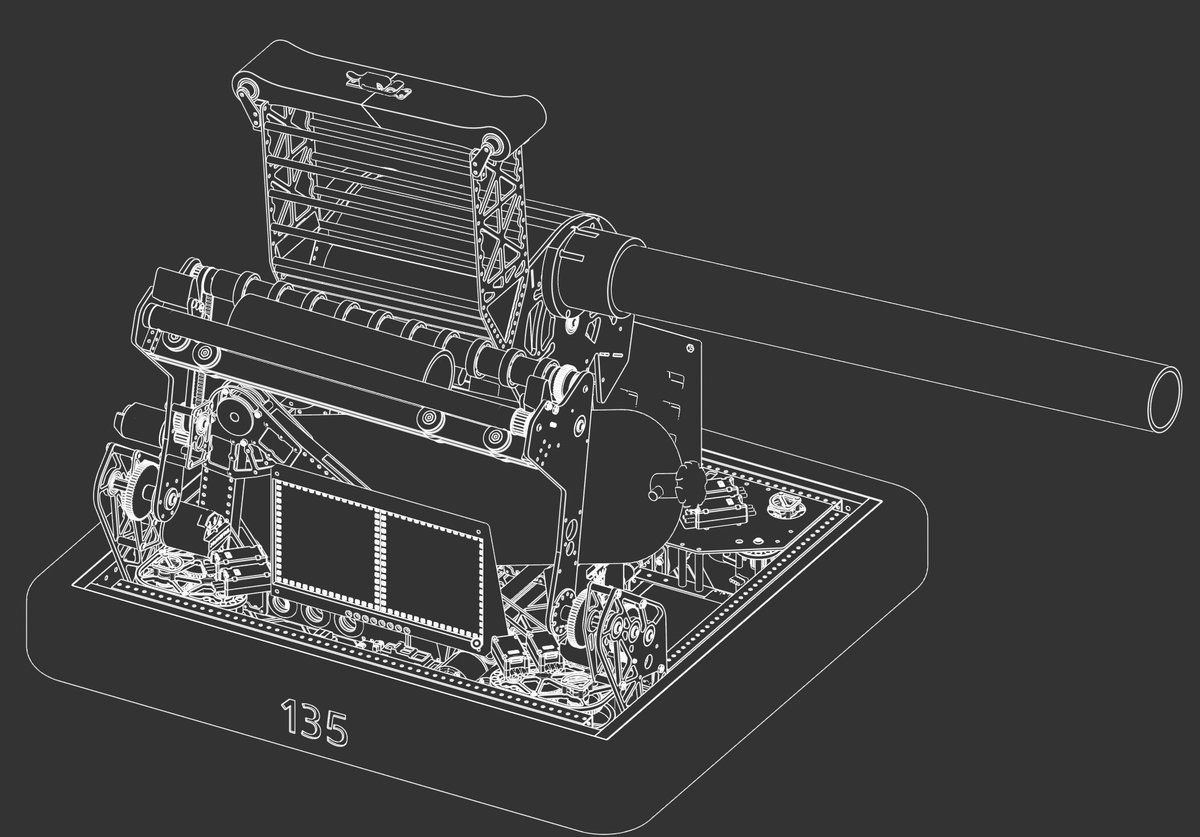
Then, school ended. By then, the robot looked like this.
By mid-summer, we had a solid concept:
- Revolving barrel on a hex shaft for multiple shots before reload.
- Indexer driven by a motor + 12-bit CANCoder to align the correct barrel with the solenoid down.
- Replaceable Holding for either a hopper or ground-fed intake system to cycling T-Shirts
- Drivetrain built on 2024's comp swerve modules, because spinning while shooting a giant cannon across a football field sounds fun. (1.625" ground clearance)
- Air system with a 1″ solenoid valve placed directly on the barrel assembly for maximum flow.
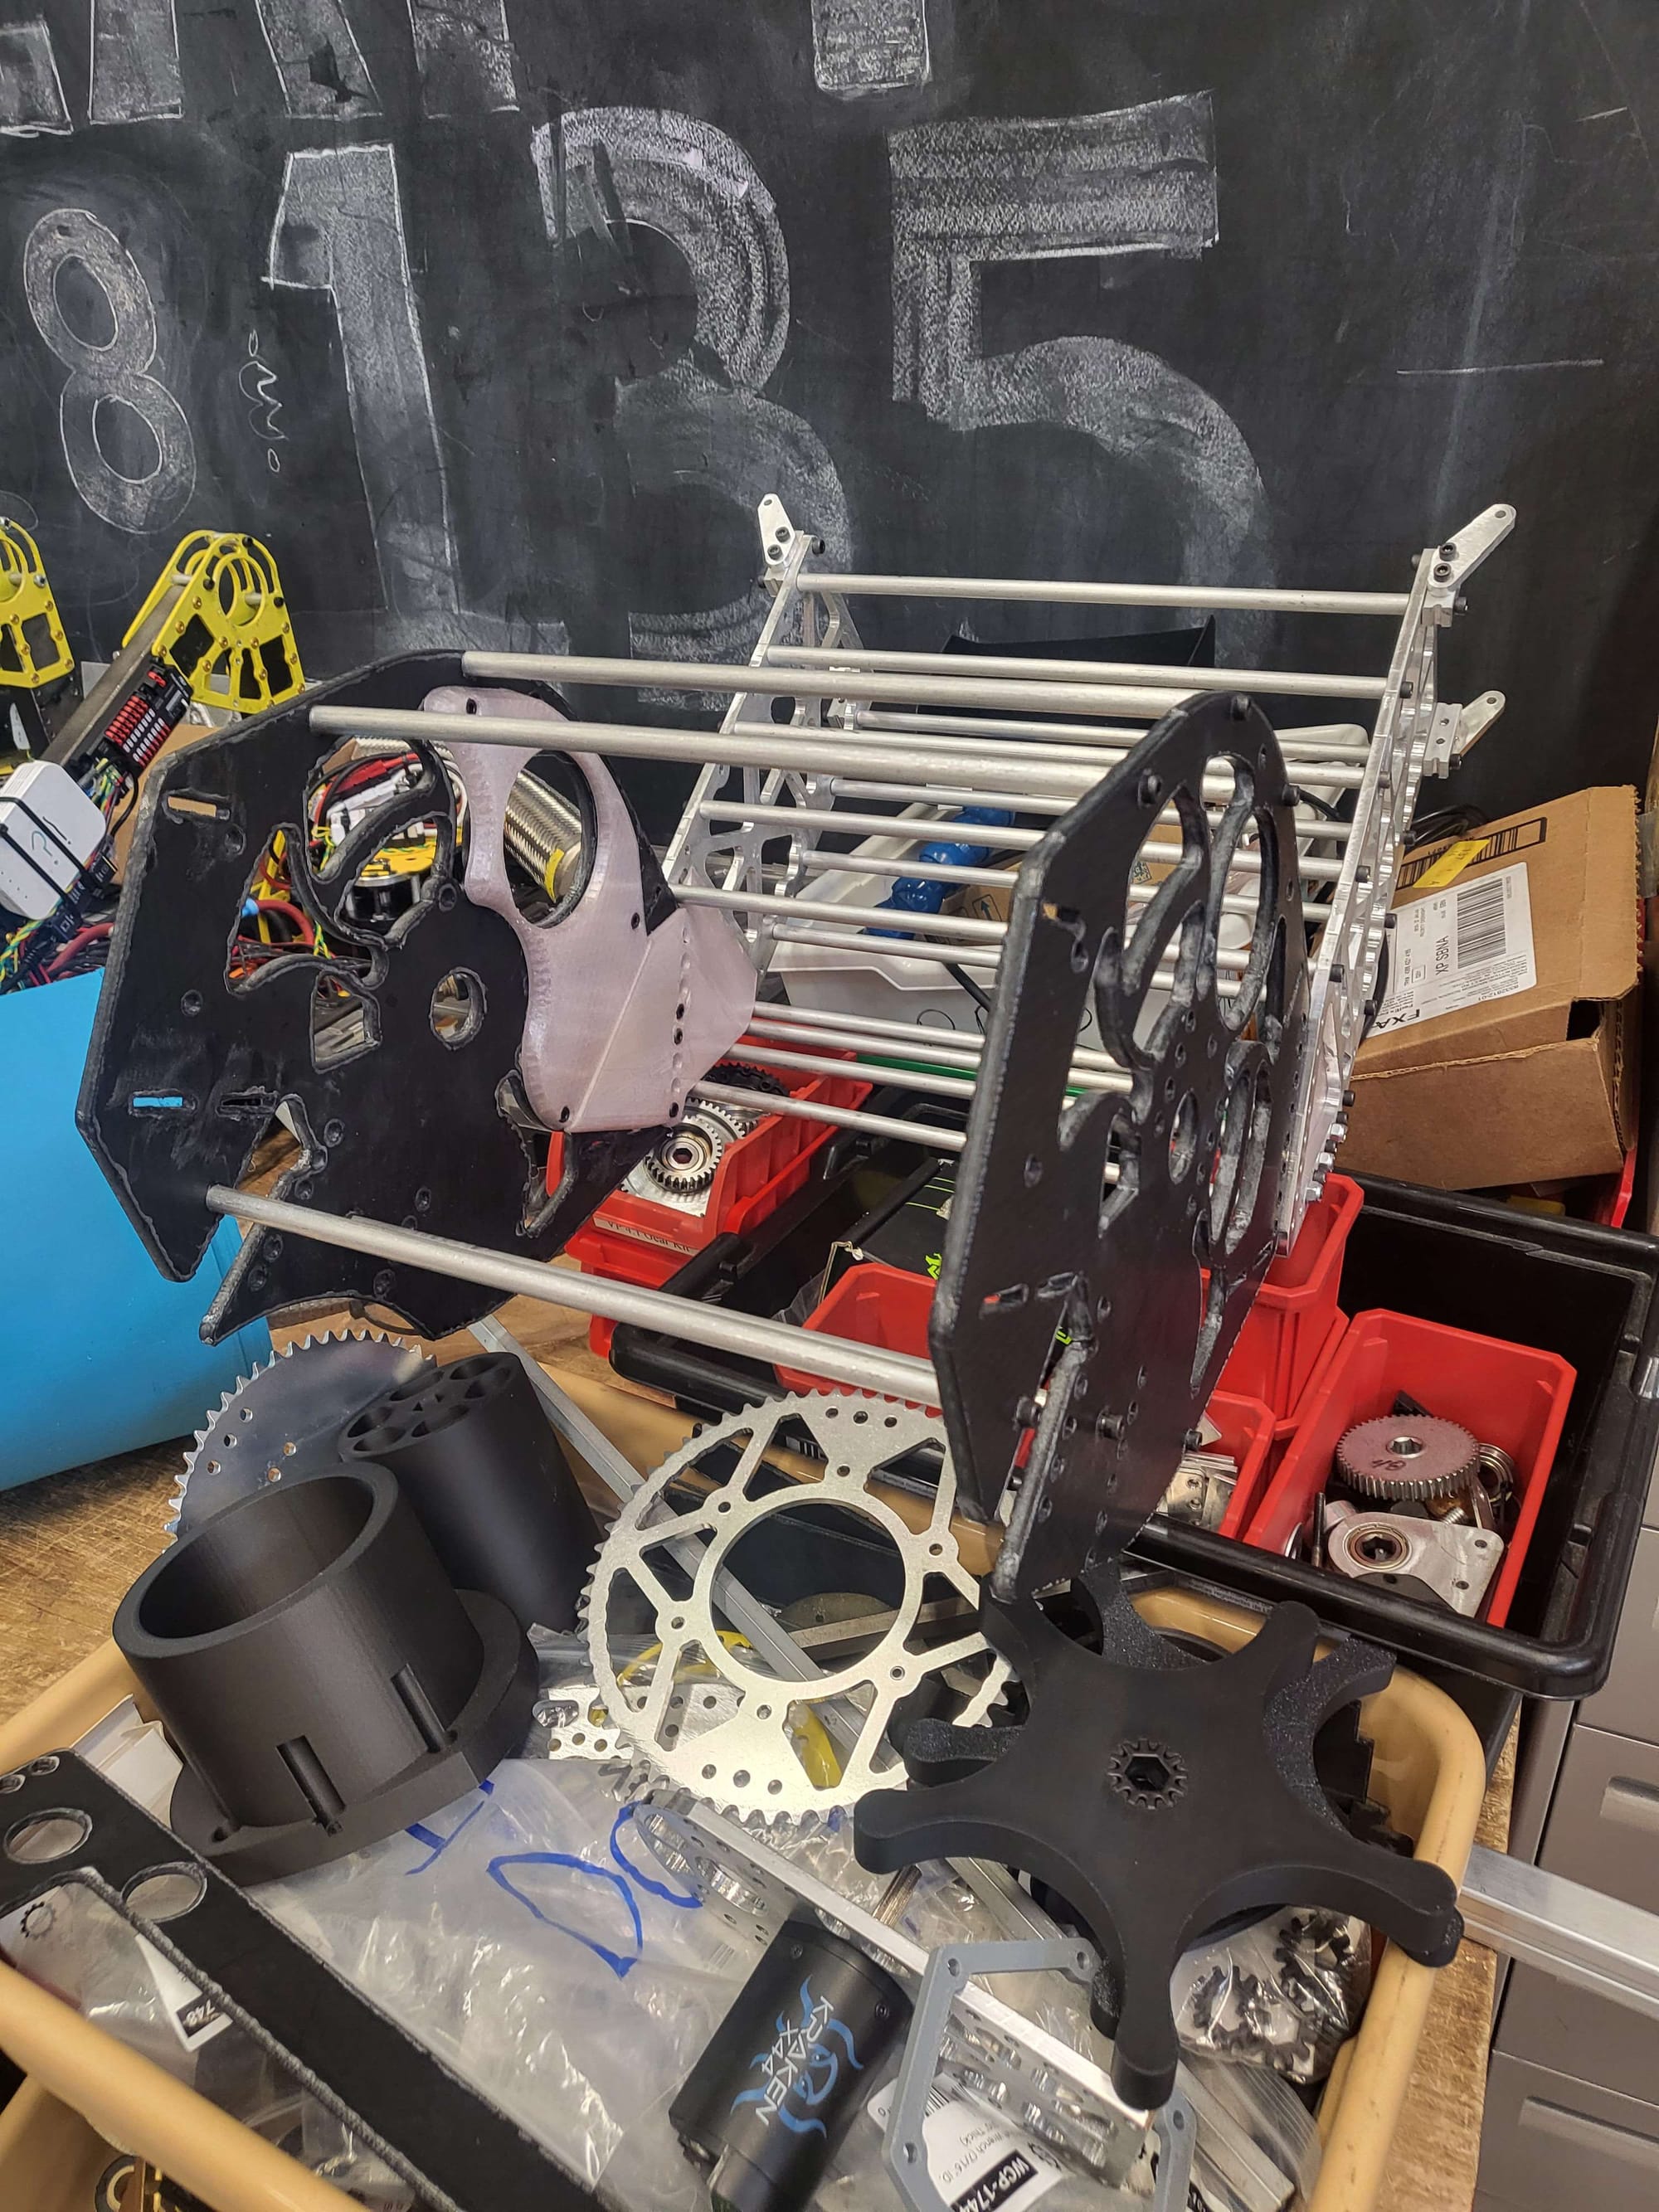
Phase 3: Machining (a.k.a. “The Haas Was Down”)
(August)
Coming back to the project in August as school started back up: our Haas was down, so a lot of parts had to wait. Luckily, before school had ended, we banged out most of the parts, and were able to continue assembling and designing other parts until it came back online.
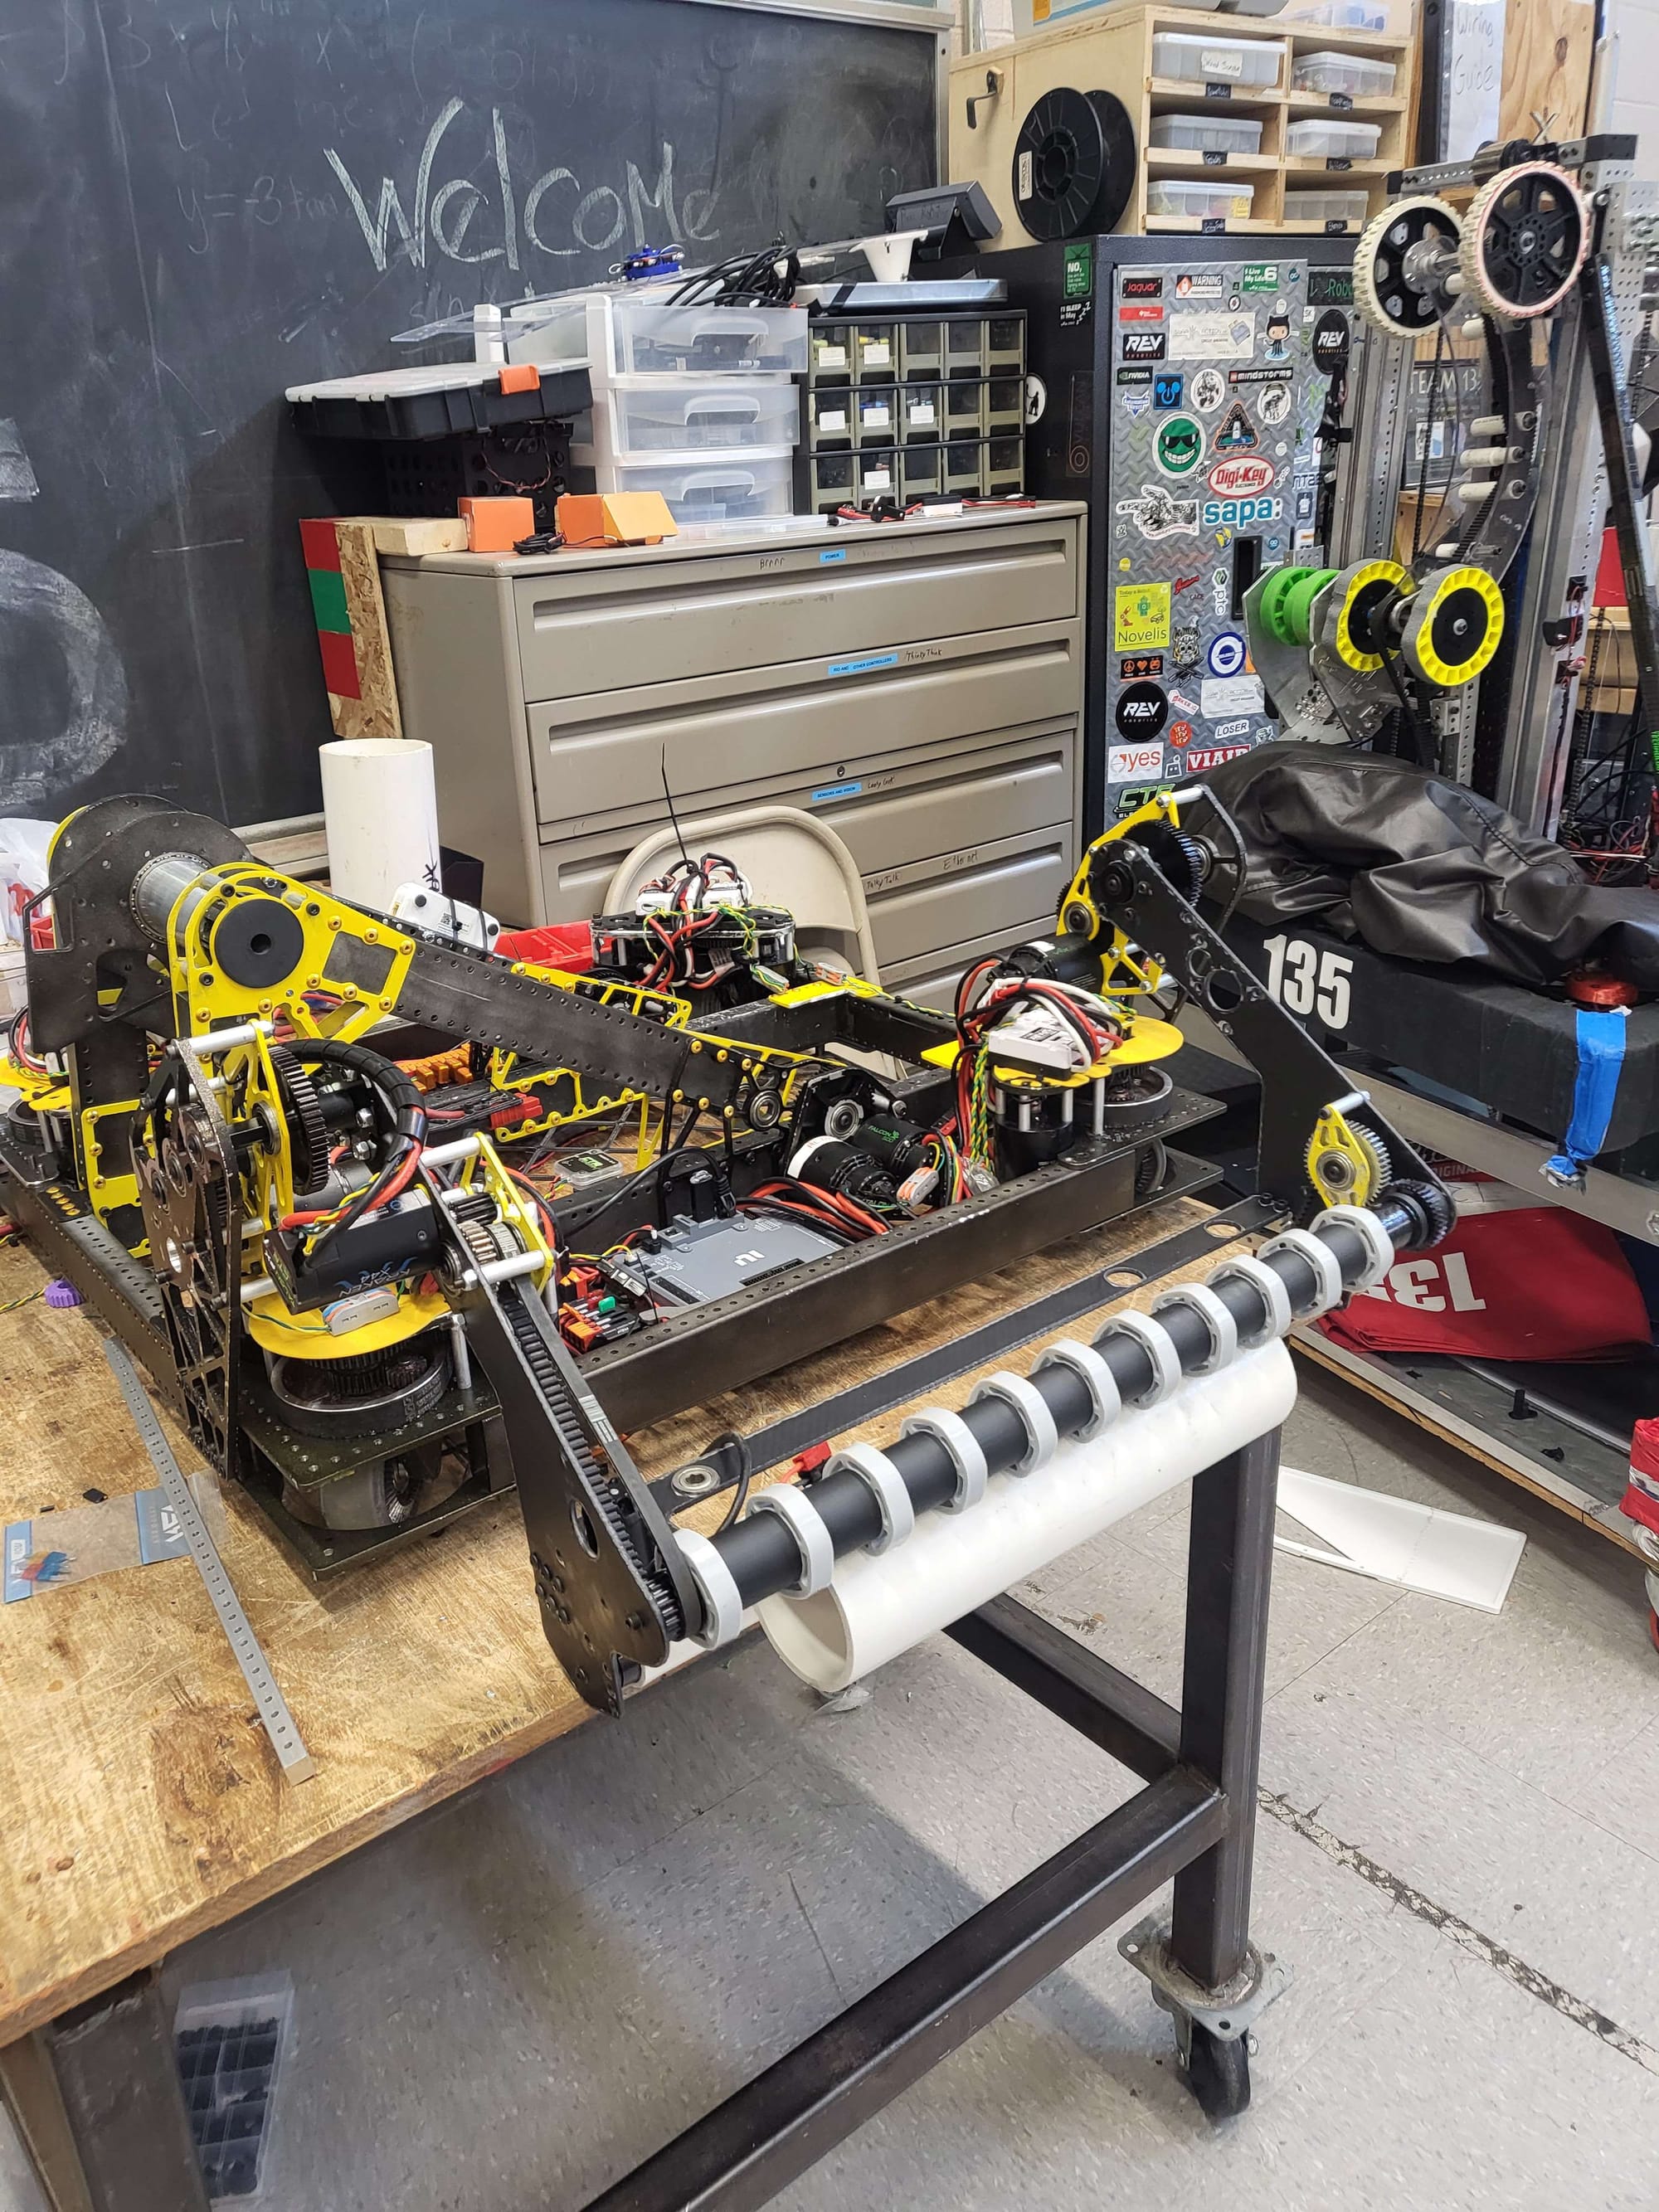
By September, the barrel tubes were cut, mounts were fabbed, and the frame started to look like a real robot, not just a chassis.
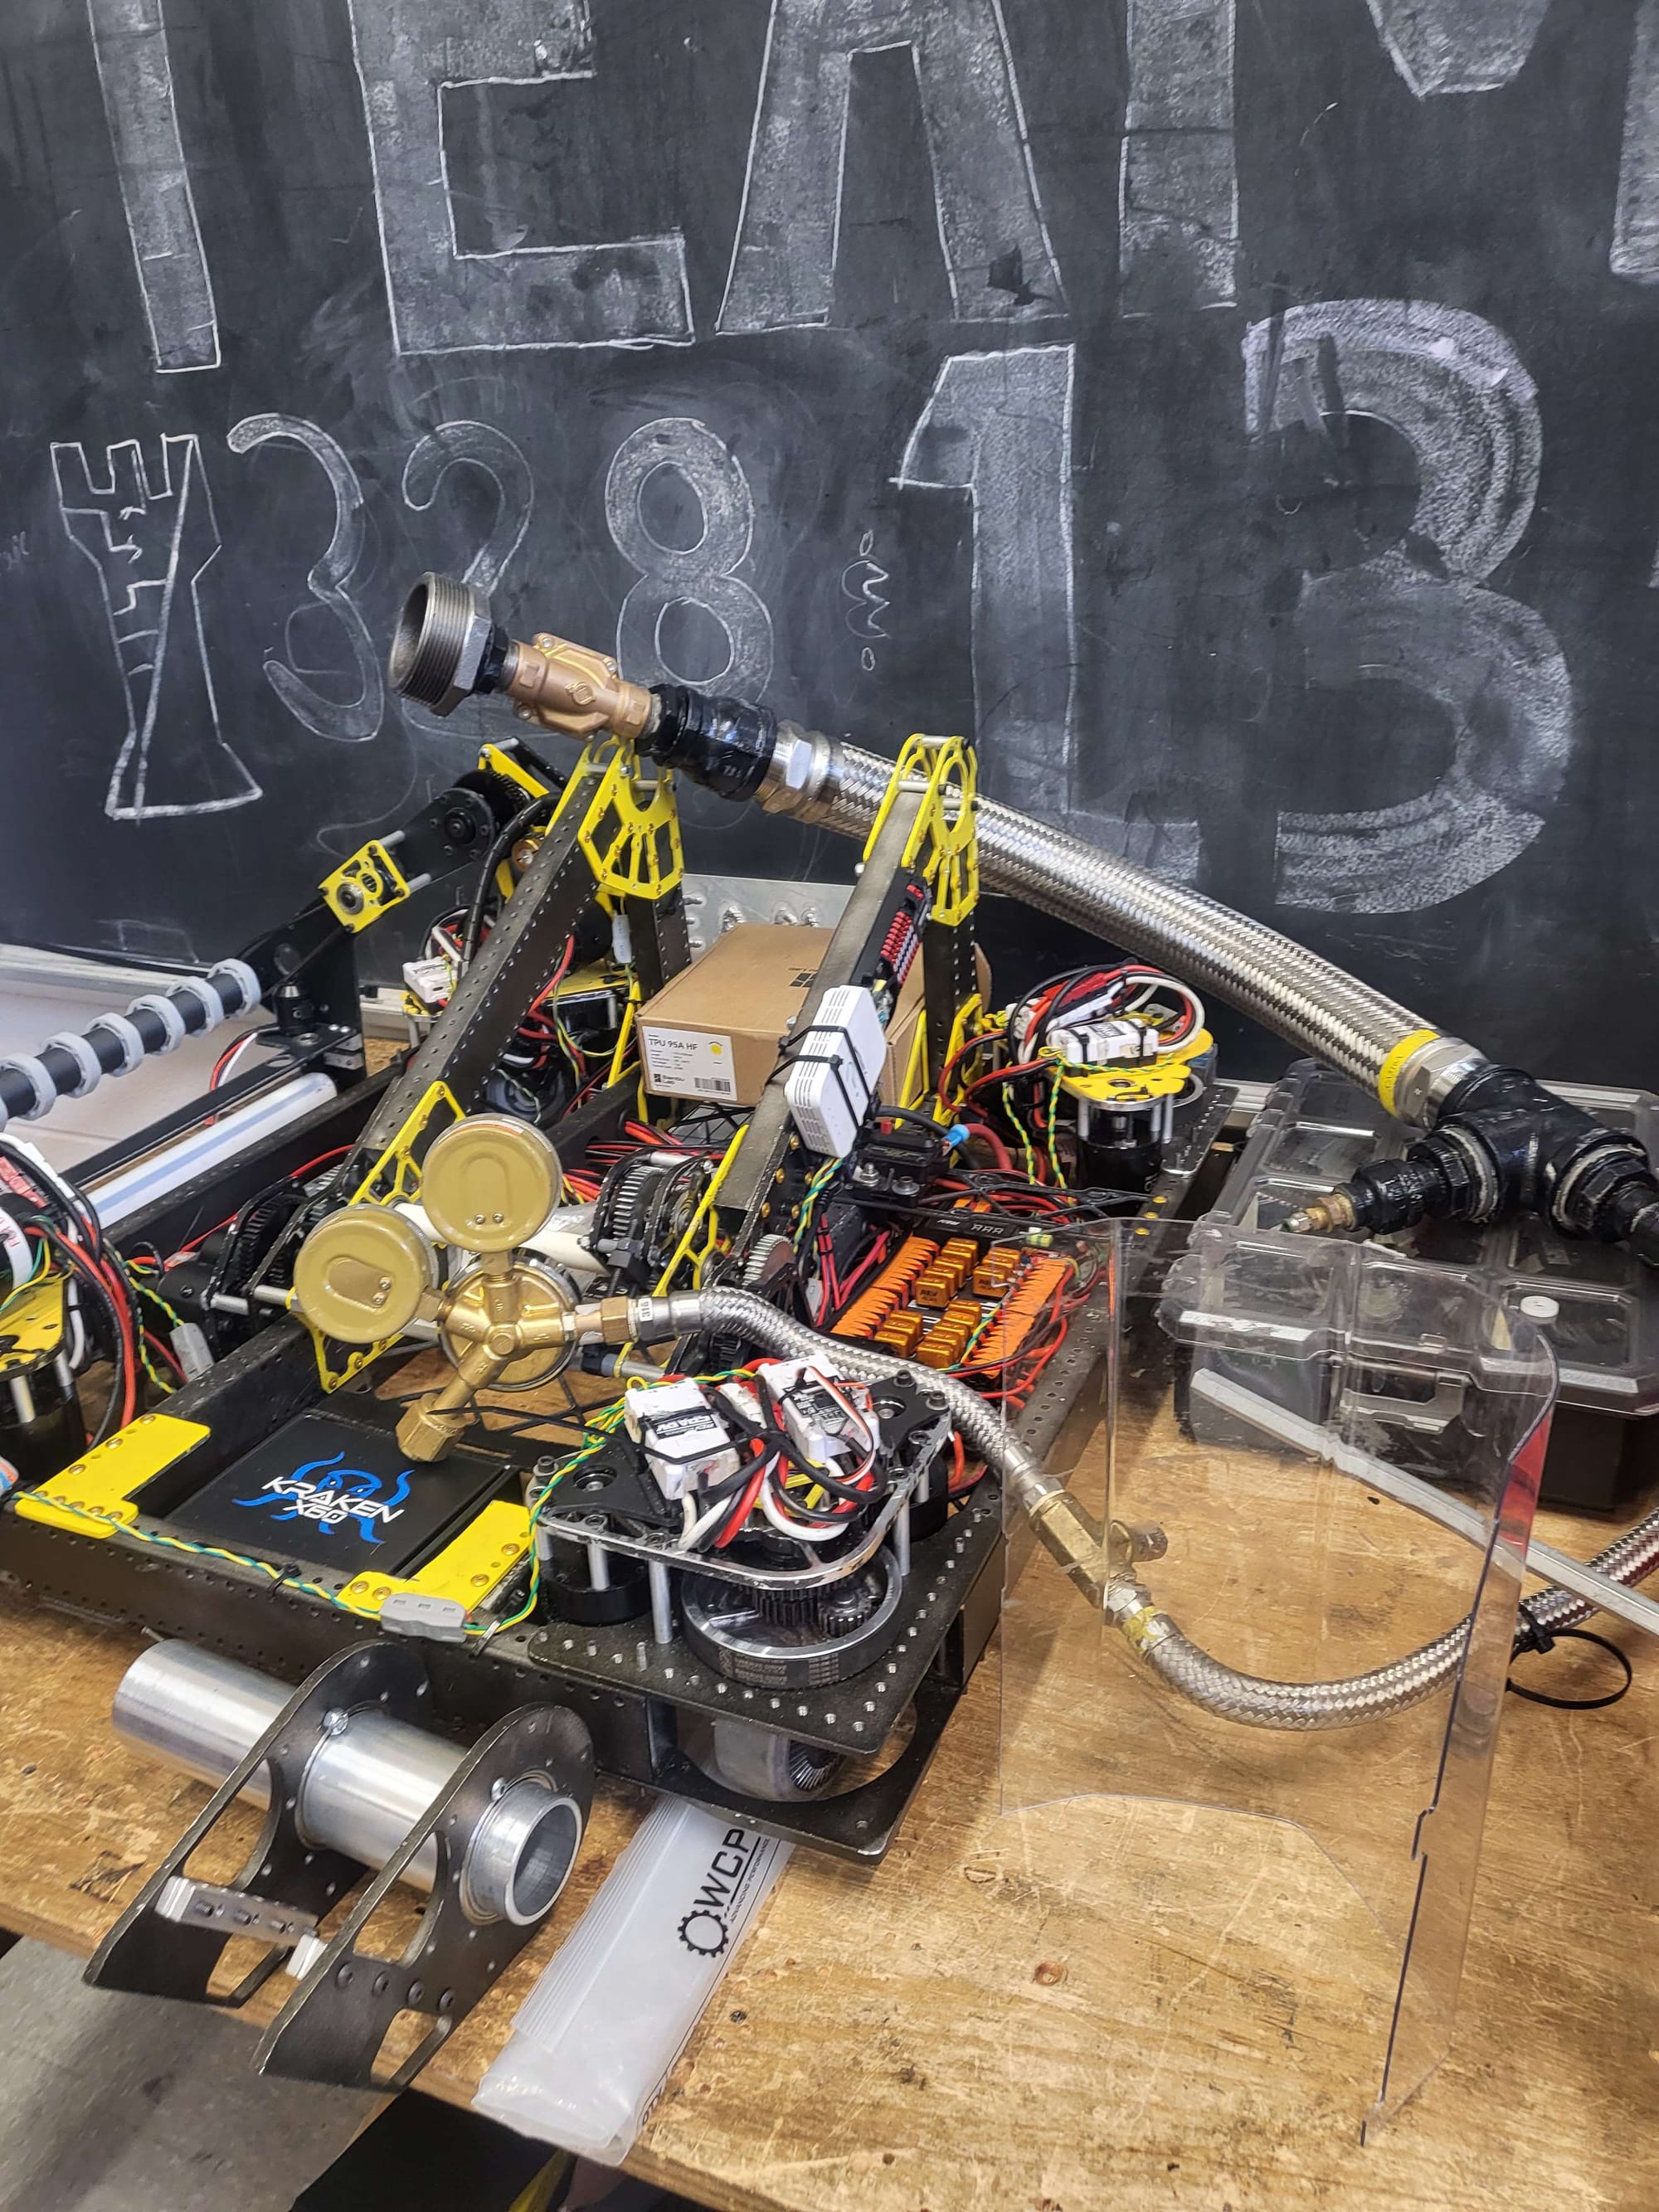
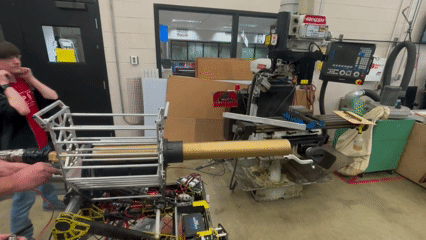
Phase 4: Assembly & Reassembly
(Early September)
We dropped the barrel and indexer assembly in, hammered a hex axle through, and declared victory… for about an hour. Then disassembly had to happen. Misaligned spacers, tolerance stacking, and one very stubborn steel hex axle taught us that “done” is never really done. It wouldn't properly spin
But that’s the season cycle, right? Assemble, test fit, rip it apart, tweak, repeat. By the second or third reassembly, everything actually lined up.
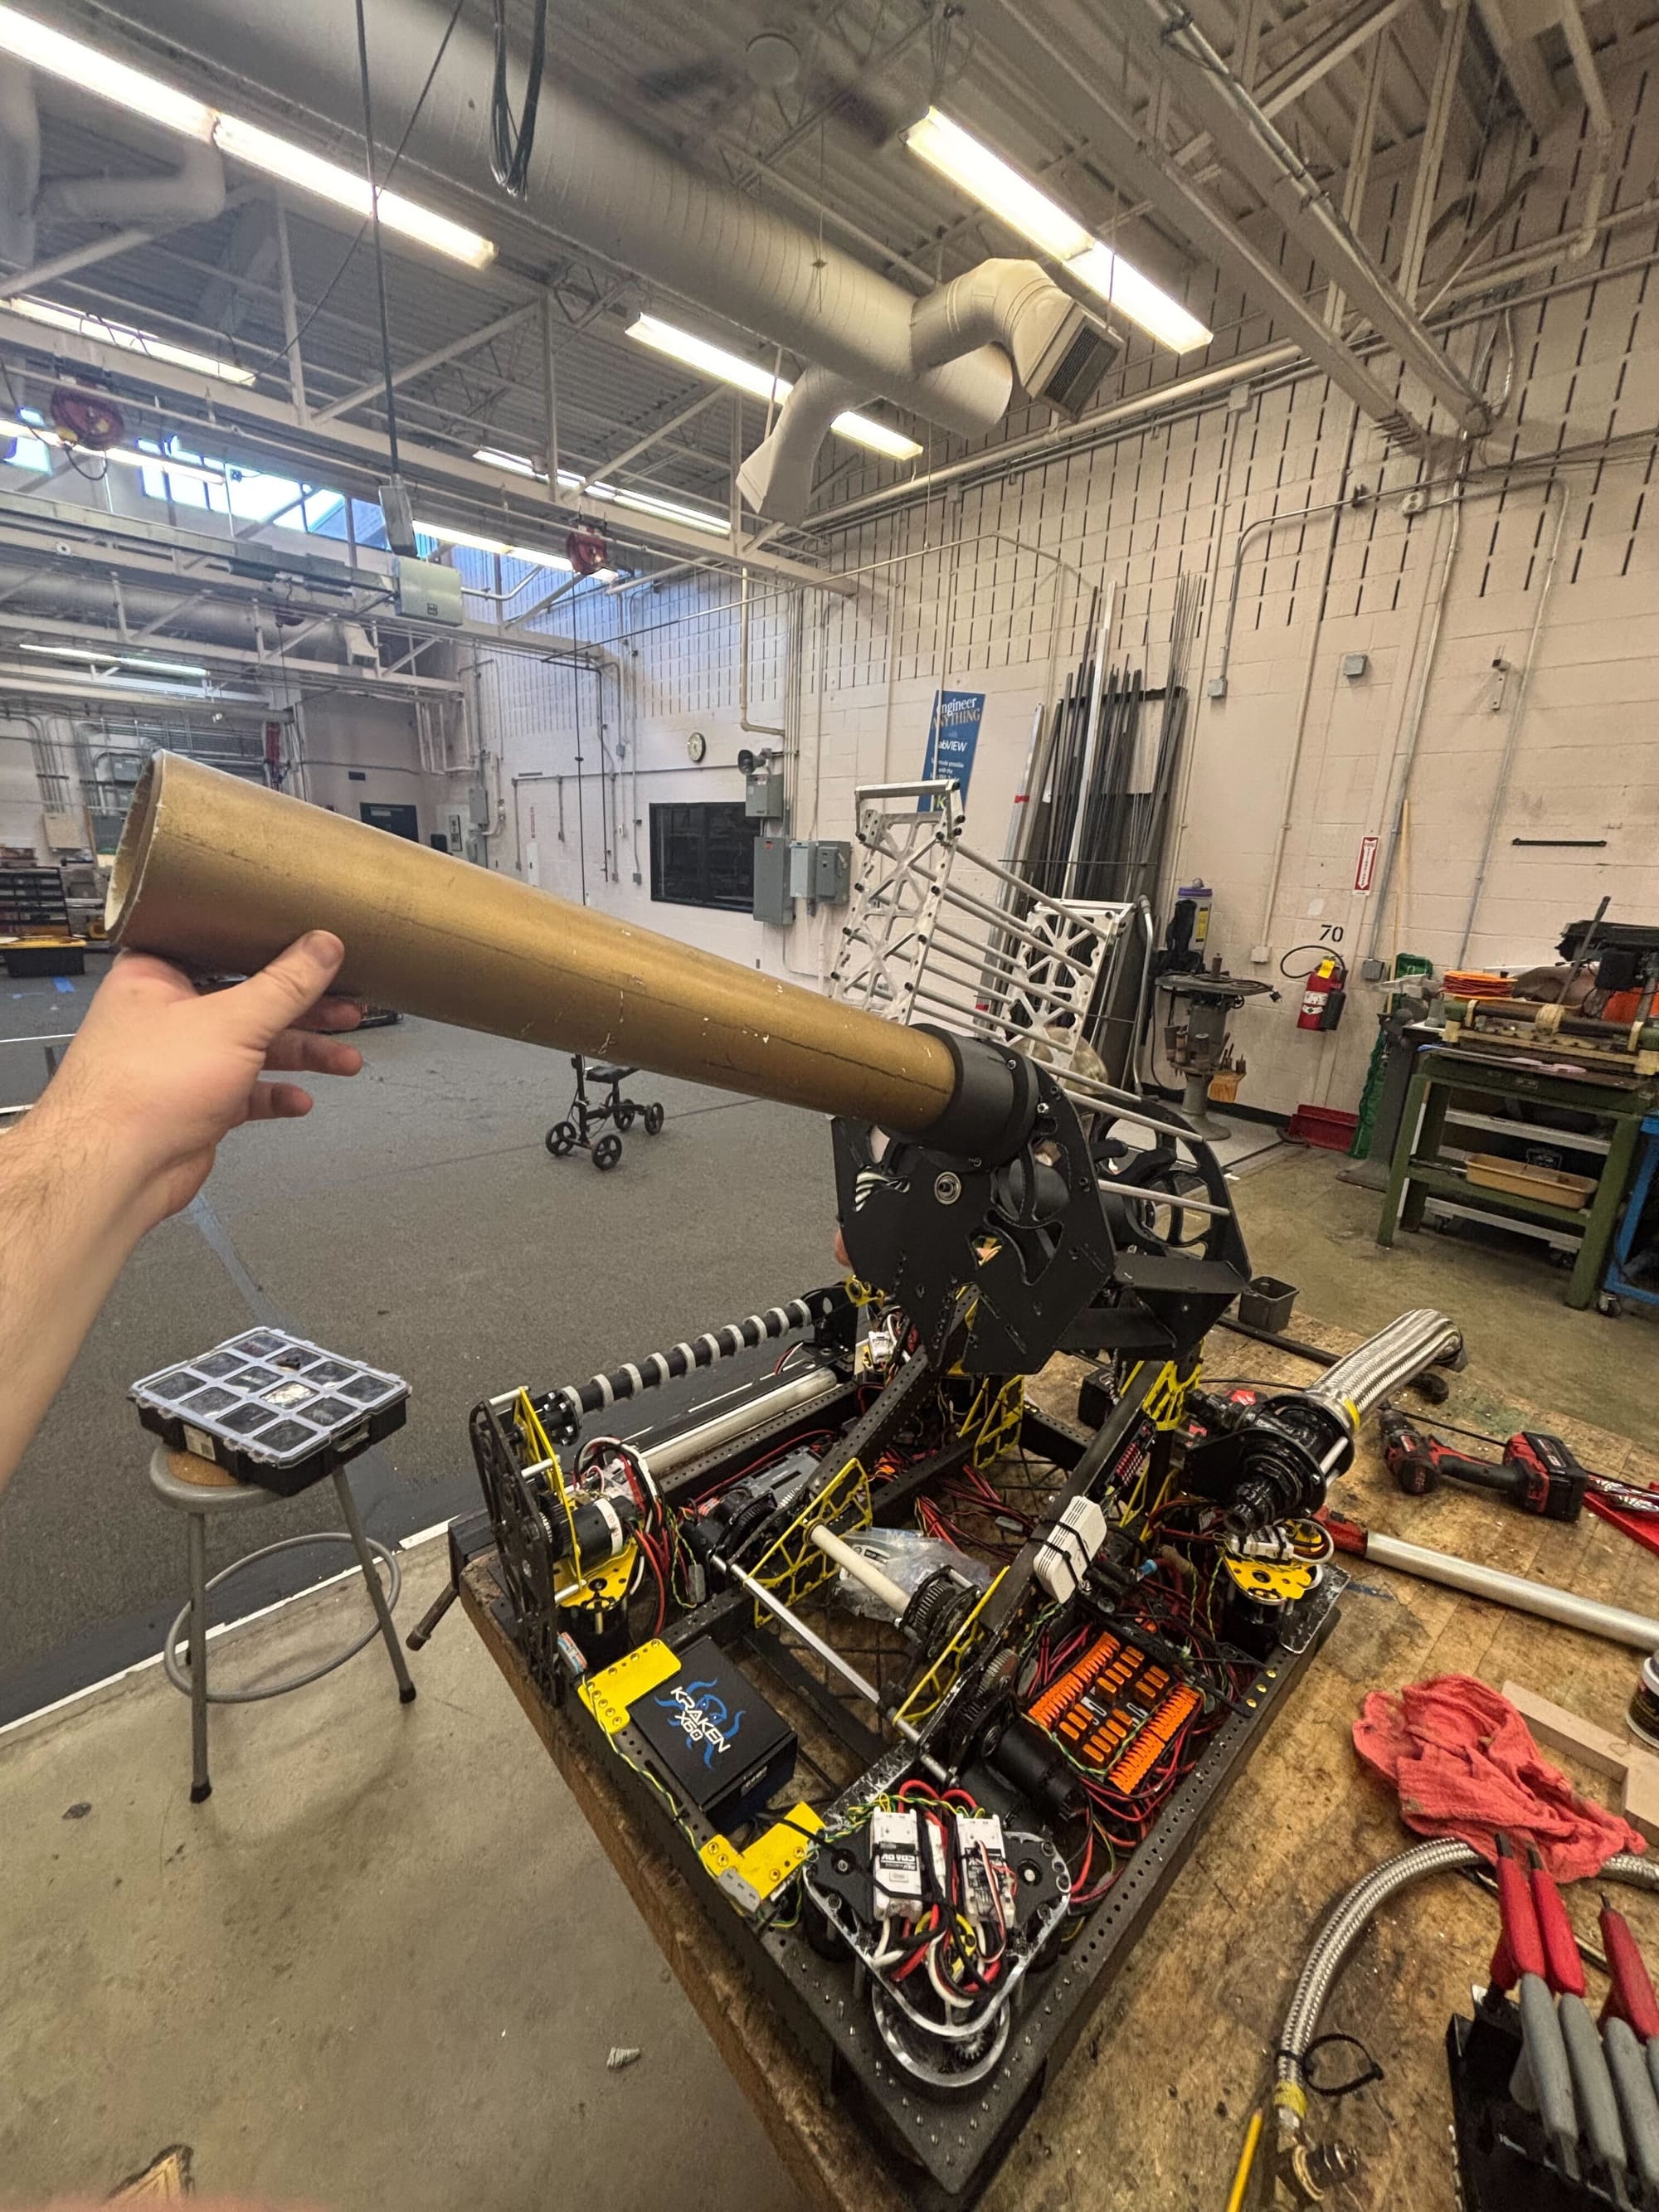
Phase 5: Testing the Boom
(Early September)
Our first test shot? 50 PSI. The shirt… farted out of the barrel. Hilarious, but disappointing.

Second test? Wrapped the shirt like a burrito, rubber bands tight, cranked it up closer to 75 PSI. This time, it flew.
Lesson learned:
- A good wrap seals the barrel and prevents tumbling.
- PSI without flow means nothing.
- The solenoid dumps air fast enough, but our seal could use work.
Phase 6: Wiring Woes
(Mid September)
Electronics time. This should’ve been easy: CAN bus, Sparks, encoder, pneumatics control module. But of course:
- One Spark MAX breakout board was just dead. Cue our wiring team rewiring it manually, and now it works.
- CAN bus took some careful rerouting, but we kept it neat and modular with panel covers you can remove without gutting the robot.
- One side is fully wired, breaker side cover is staged, and everything else is prepped to just plug in.
We even managed to mount the LED panels before wiring (don’t ask, it made sense at the time).
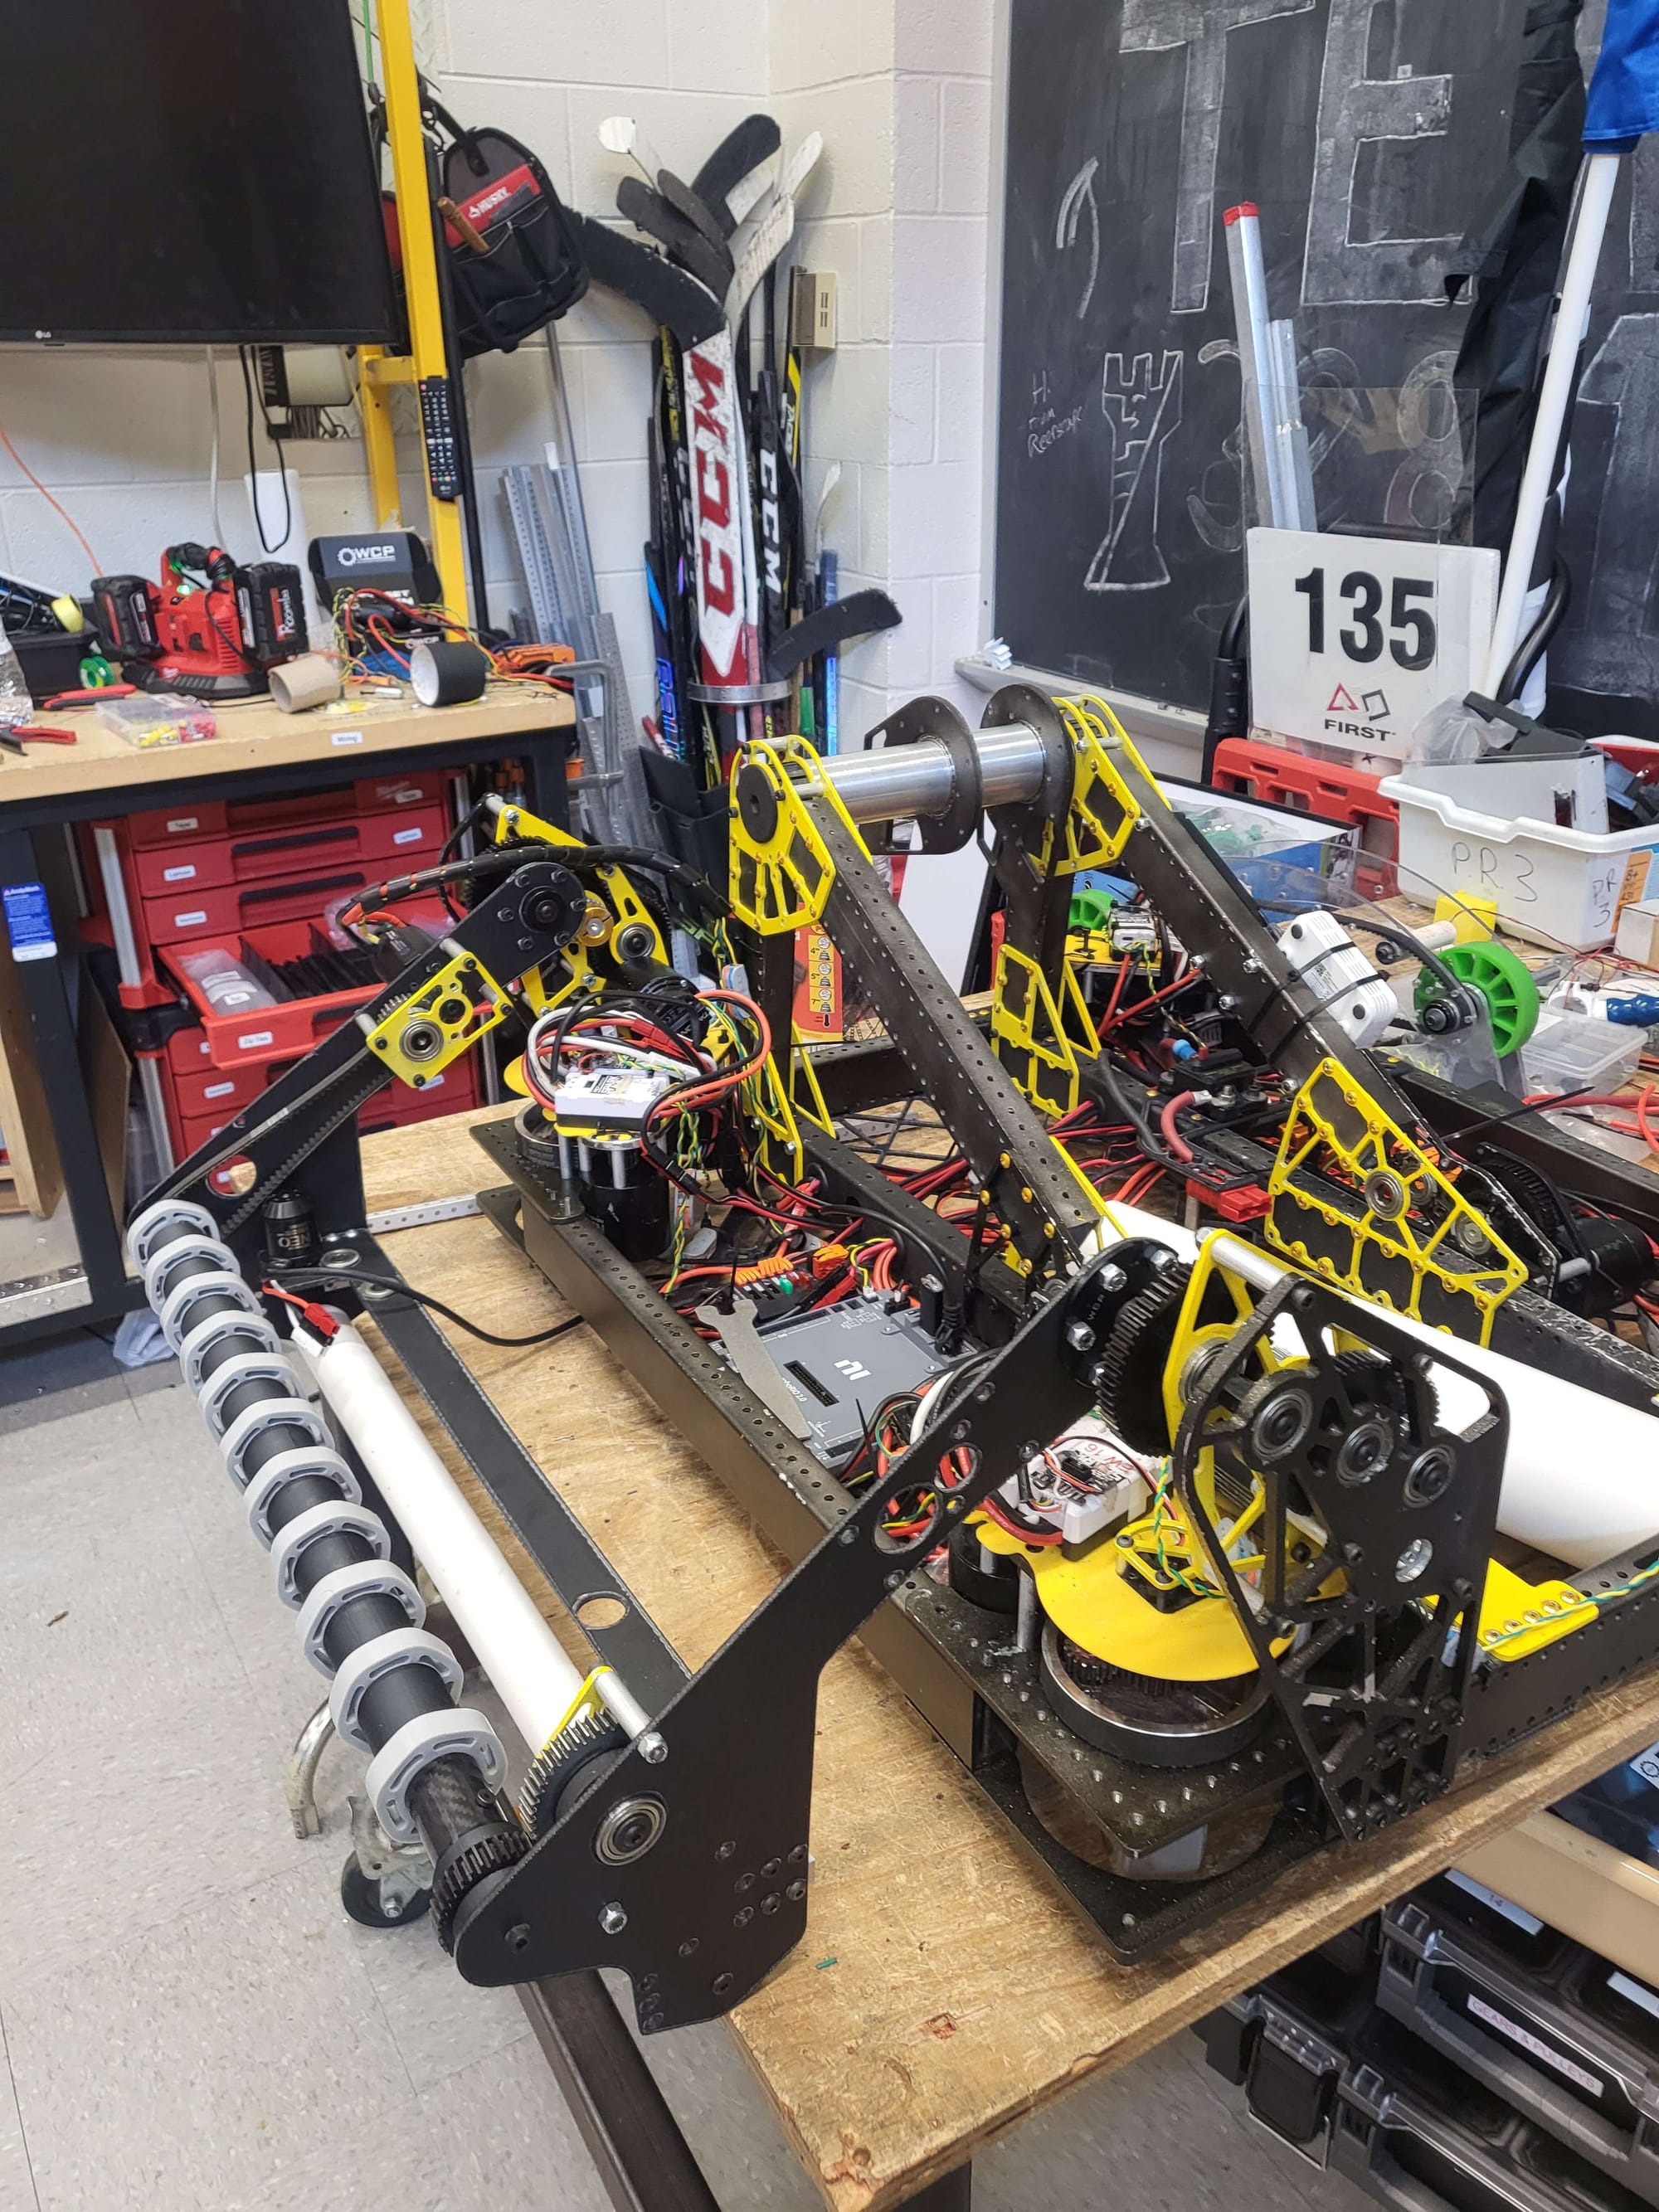
Phase 7: Making It Clean (Final Stretch)
Where we are now (mid-September):
- Barrel is cut, assembled, and sealed.
- CAN bus is complete.
- One side is fully wired.
- Indexer axle is in, solenoid pipe just needs final remount.
- Bumpers are built, waiting on noodles and wrap.
- Covers are all mounted, ready for final wiring inside.
What’s next:
- Re-hammer the axle pin, seal the barrel assembly.
- Finish wiring inside the cover and power-on test (with mentor smoke-check).
- Assign CAN IDs and verify encoder accuracy.
- Wrap bumpers and mount them.
- Software test fire (!!).
Target: done and firing cleanly while looking clean by the 26th, just in time for Homecoming kickoff.
Phase 8: Looking Ahead
Once it’s dialed in, the cannon will:
- Launch shirts at least 40 feet depending on size and wrap.
- Drive cleanly across turf, parades, and basketball courts.
- Light up the crowd with LEDs synced to firing.
- Be safe, sturdy, and actually serviceable (unlike its PVC and pure-steel ancestors).
It’ll debut at the football game and parade, where we’ll finally get to see the “We Ball” moment in front of a crowd.
Closing Thoughts
The whole robot was designed to be a mock FRC season. The discovery, CAD, machining, assembly, reassembly, wiring, testing, and now polish. We didn’t just copy what “the best” teams did—we learned by doing, failing, and fixing.
It’s not perfect. It doesn’t need to be, or should be. Because when it launches a shirt into the stands and the crowd cheers, what can we say?
We Ball.
P.S. Stay tuned for a hype and reveal video!